Reminders Premium
What's included? #
Flexible payment options to meet any budget.
Enable premium features #
If you have any issues please contact us at reminders.list.app@gmail.com
I'm having trouble upgrading #
After clicking a payment plan button and paying for it your device must communicate with the Reminders server to apply the upgrade to your account. If this fails the "Close" button will not become active. Don't worry, we just need to retry.
How do I backup/restore my data? #
Reminders has a built-in backup/restore function available in settings. When you tap backup Reminders creates a reminders_backup.json file in your /Download directory.
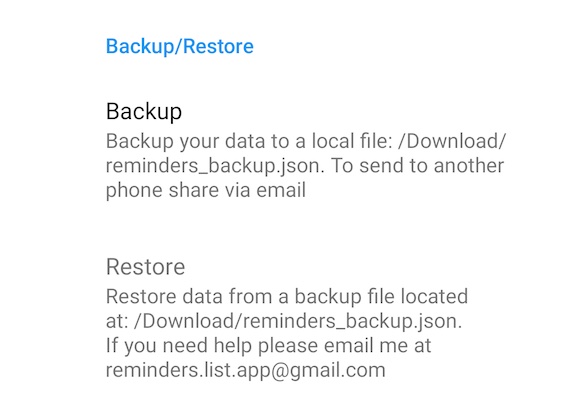
If you have any issues please contact us at reminders.list.app@gmail.com
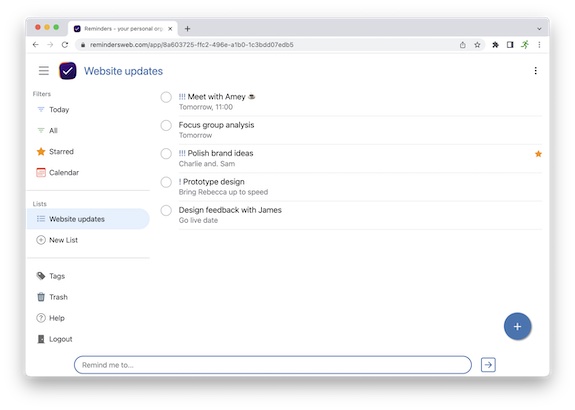
To use the Reminders web app simply tap the log in button from the menu at the top of this screen.
By default when closing Reminders. There is also a setting to sync when opening Reminders.
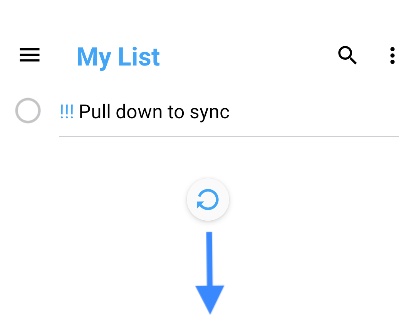
You can force a sync at any time by using pull down to refresh on the main list view.
Reminders also includes a push mechanism that allows changes made via the web app or from other devices to be pushed to all other devices linked to your account.
Subscriptions are handled by Google. Therefore, we need to change your subscription type:
To sync your data Reminders requires a data connection. Some VPN or ad blocking apps can block data connections so either disable them or add Reminders to their whitelists. To check your connection with Reminders server:
How do I remove my account? #
Open Reminders -> Settings and click Delete account. This will permanently delete all data in the cloud and cannot be undone. Note: this will not cancel your subscription, this must be done through the Google PlayStore app.
"The way to get started is to quit talking and begin doing.” - Walt Disney.